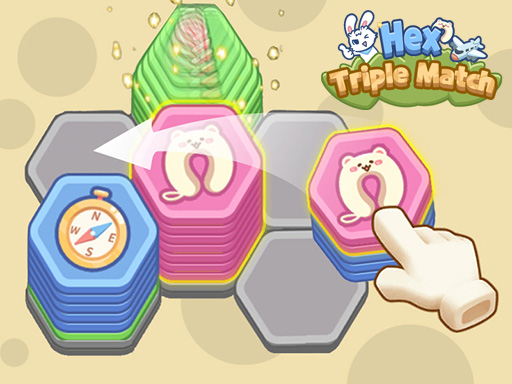
In an era where traditional grid-based match-3 puzzle games have dominated the casual gaming landscape for years, players are constantly searching for the next evolution in brain-teasing entertainment. Enter Hex Triple Match, a brilliant and highly innovative title that shatters the limitations of two-dimensional puzzles. By introducing a unique "spatial hexagon stacking" mechanic, this game requires you to think not only horizontally across the board, but also vertically, managing complex layers of colorful geometric blocks. It is a genuine mental workout dressed up in a vibrant, relaxing aesthetic.
If you find yourself breezing through the introductory levels only to hit a massive difficulty spike—where your board becomes choked with mismatched, fragmented stacks resulting in an agonizing "Game Over"—then you urgently need to rethink your foundational strategy. In this massive, 1000+ word expert breakdown, we are going to completely deconstruct the core mechanics of Hex Triple Match. From mastering the ironclad "Rule of 10" to navigating the treacherous "Locked Cells," and surviving the grueling marathons of Challenge Mode, this guide will equip you with the knowledge to clear boards like a seasoned professional.
Phase 1: Core Mechanics and the Secret of Vertical Stacking
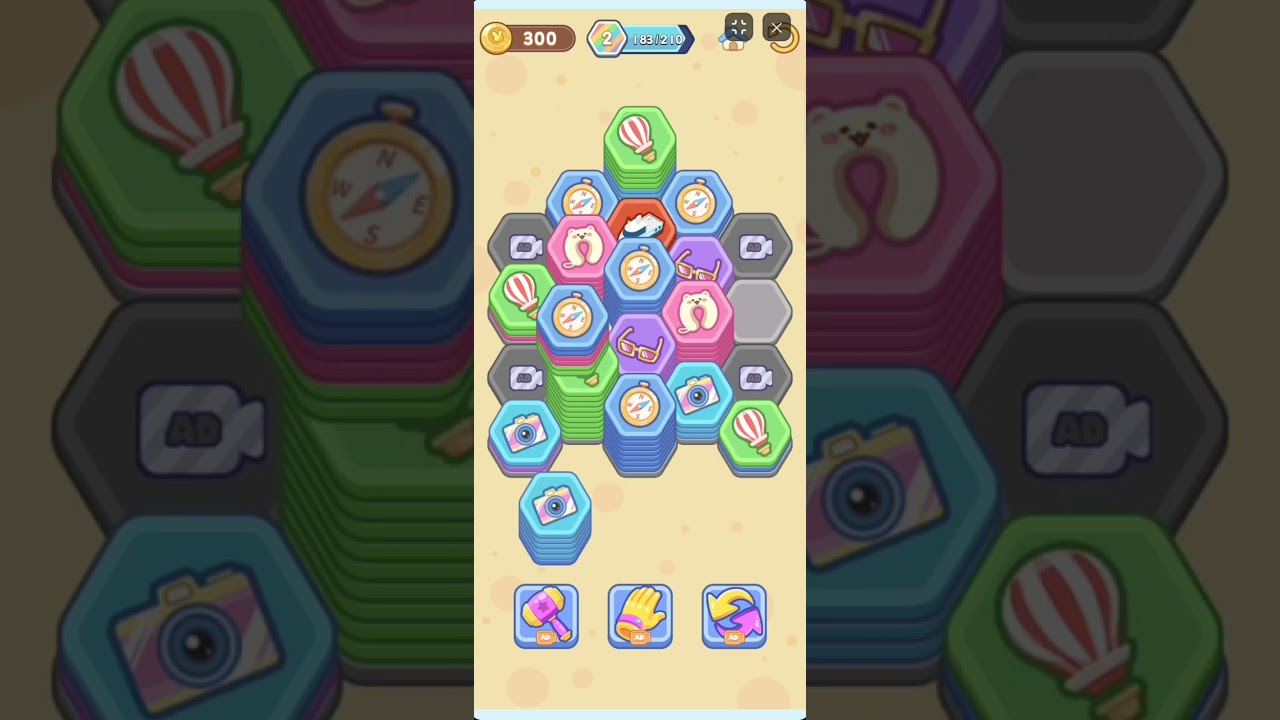
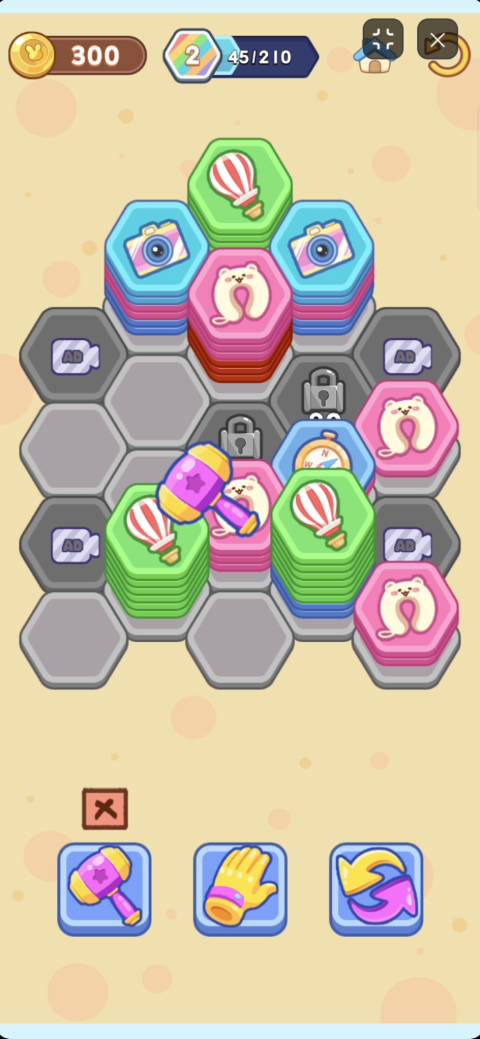
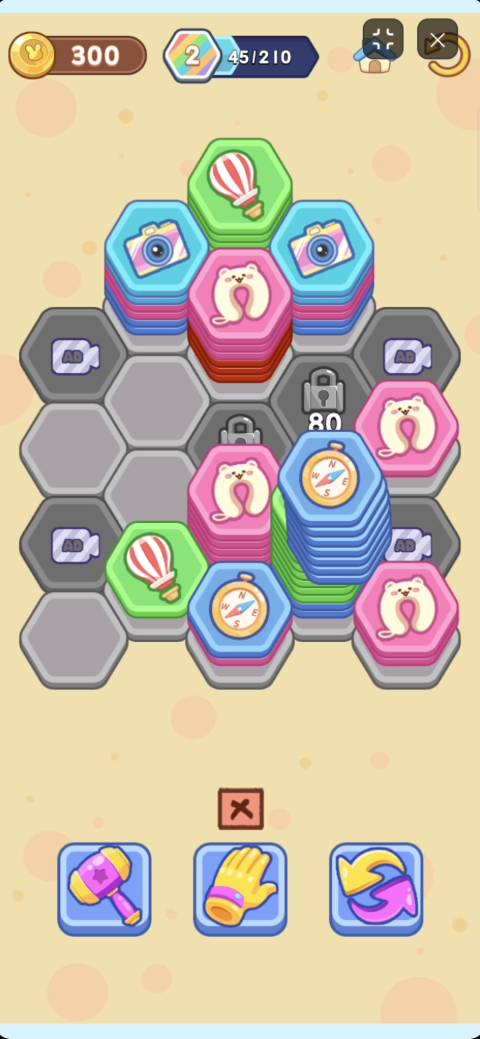
Unlike classic tile-matching games, Hex Triple Match revolves around physical layering and spatial awareness. At the bottom of your screen, the game will randomly generate three distinct sets of hexagonal blocks, varying in color and height. Your primary objective is to click, drag, and strategically drop these block sets onto the larger honeycomb grid above. To clear the level, you must accumulate a specific target score before running out of valid moves or grid space.

The Rule of 10 (The Match Condition): The magic happens when you place a set of blocks on the board. If the newly placed blocks are adjacent to an existing stack that shares the exactly same top-layer color, they will automatically magnetically attract and stack onto each other. However, they will only burst and clear when the stack reaches exactly 10 blocks of the same color. If you only manage to gather 9 red blocks, they will simply sit there, towering ominously and eating up precious board real estate. It is the arrival of that crucial 10th block that triggers the satisfying pop, instantly freeing up the grid cell and rewarding you with a massive point injection.
This single concept is the great divide between amateur players and grandmasters. The game generously allows you to stack completely different colors within the same grid cell (as long as you are placing a new stack onto a vacant spot first). Beginners are terrified of mixing colors, meticulously trying to keep everything separate, which rapidly leads to a gridlocked board. Elite players, however, intentionally build "Mixed Pyramids." They know that once the top 10 red blocks finally clear, the 8 blue blocks buried underneath will instantly be exposed. If those blue blocks are adjacent to another blue stack, it triggers an explosive, spectacular Chain Reaction. Learning to hide your future moves in vertical space is the ultimate key to victory.
Phase 2: Breaking the Deadlock – Locked Cells and Pre-placed Obstacles
As you delve deeper into the game's campaign, the developers introduce suffocating environmental hazards to test your spatial reasoning. The most notorious of these are the Locked Cells. You will encounter grid positions wrapped in heavy iron chains, rendering them completely unusable; you cannot drop any new block sets directly onto them.
To shatter these chains and reclaim the territory, you must successfully complete a set number of full 10-block eliminations in the grid spaces immediately adjacent to the locked cell. Furthermore, advanced levels often begin with the board already littered with pre-placed, chaotic, and messy stacks of mixed colors. In these high-pressure scenarios, you must adopt a "centripetal" strategy: prioritize dropping your newly generated bottom blocks near these locked and pre-filled areas. Even if it temporarily seems inefficient, your absolute primary goal must be to chew through those starting obstacles and break the chains to open up your board's breathing room.
Gameplay Walkthrough: A Symphony of Spatial Movement
While theoretical strategies are essential, witnessing the mechanics in motion is the fastest way to truly grasp the flow of Hex Triple Match. Watch the extensive gameplay demonstration below. Pay close attention to how the player handles congested late-game boards, their precise deployment of power-ups, and how they intentionally set up cascading chain reactions.
Phase 3: Extreme Rescue Operations – Mastering the Three God-Tier Items
No matter how flawlessly you plan your moves, the underlying RNG (Random Number Generation) of the block spawns guarantees that you will eventually face a mathematically impossible gridlock. To prevent pure frustration, the game arms you with three incredibly potent life-saving items. Because these tools cost valuable resources, squandering them early on is a guaranteed death sentence for later levels.
1. The Tactical Hammer
This is your most direct, brute-force method for board manipulation. By activating the Hammer tool, you can select any single stack of blocks on the board and smash it into oblivion, instantly wiping it clean and leaving a beautifully empty grid cell in its wake.
When to strike: Never waste the hammer on a stack of 8 or 9 blocks that are just waiting for one more piece to naturally clear. The optimal target for the hammer is the "orphan stack"—a tiny, 1 or 2-block stack sitting right in the center of the board, boasting a color that is completely useless and actively blocking adjacent connections.
2. The Move Hand (Spatial Shift)
The Move Hand allows you to temporarily bend the laws of physics. It grants you the ability to pick up an entire, already-placed stack of blocks from the board and freely relocate it to any empty grid cell.
The clutch play: This item has the highest skill ceiling in the entire game. Imagine you have a stack of 9 yellow blocks on the far left, and another stack of 9 yellow blocks on the far right, separated by a mountain of junk. By using the Move Hand to lift one yellow stack and drop it right next to the other, you not only instantly trigger a 10-block elimination, but you also completely free up the grid space you just vacated. It is a brilliant two-for-one maneuver.
3. The Destiny Refresh
When your board is teetering on the edge of disaster, and the game maliciously spawns three bottom block sets in colors you absolutely do not need, do not force them onto the board. Hit the Refresh button. It will instantly vaporize those three useless options and generate a fresh trio of blocks.

Phase 4: The Ultimate Trial – Conquering Challenge Mode
When the standard campaign levels no longer test your limits, it is time to step into the arena designed for the hardcore elite: Challenge Mode.

In this brutal endgame mode, the grid size expands exponentially, often taking the shape of complex patterns like massive snowflakes or intricate stars. The target scores are astronomical, meaning a single session can demand dozens of minutes of sustained, flawless focus. This is a marathon of endurance and spatial memory. In Challenge Mode, patience is your greatest weapon. You must ruthlessly prioritize keeping the central arteries of the board clear, constantly pushing the "junk" mixed stacks to the outer perimeter.
Furthermore, never underestimate the power of the Daily Check-in event. Consistently logging in is the most reliable, free-to-play method of stockpiling the Hammers, Move Hands, and Refreshes you will desperately need to survive the later stages of Challenge Mode.
Final Thoughts: Architect of the Hexagon Universe
Hex Triple Match is not just a casual tapping game; it is a rigorous exercise in vertical spatial visualization and multi-step logic. The sheer dopamine rush of successfully executing a 10-block merge that triggers a cascade of hidden layers is unmatched in the genre. By mastering the Pyramid Effect, strategically deploying the Move Hand to create artificial linkages, and braving the depths of Challenge Mode, you will evolve from a novice stacker into a true geometric architect. Take a deep breath, survey your board, and let the chain reactions begin!